Crypto Market Learning Index
Complete roadmap from blockchain fundamentals to decentralized finance, derivatives, and algorithmic crypto trading.
Foundation & Chart Analysis
5 ModulesCrypto Market Basics
Blockchain, wallets, tokens & exchanges
Candlestick Patterns
High-volatility crypto candlestick setups
Chart Patterns
Breakouts, trendlines & volume confirmation
Market Analysis
On-chain, fundamental & technical analysis
Support & Resistance
Dynamic liquidity levels & psychological zones
Crypto Derivatives & Whale Liquidity
4 ModulesSupport & Resistance in Crypto
Support and resistance are the fundamental building blocks of technical analysis and price action. Learn to identify high-liquidity price floors and ceilings to execute precision entries, stops, and targets.
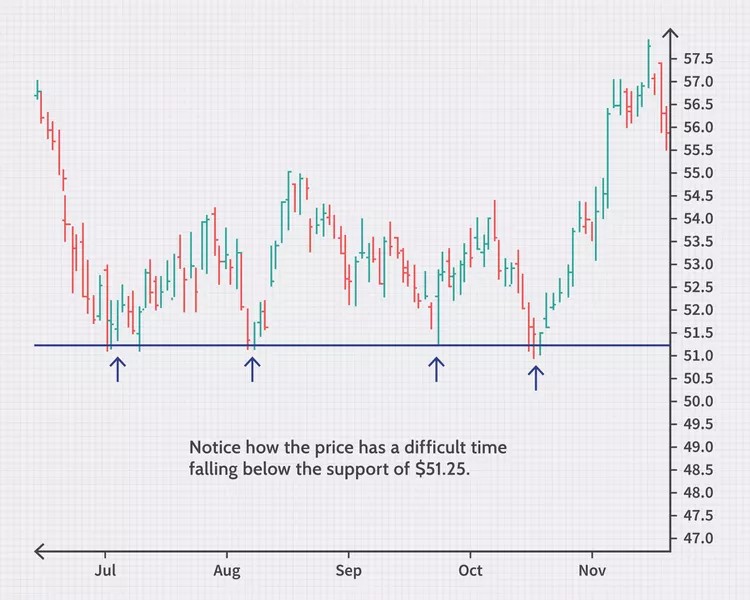
Support Zone
A price level where a crypto asset tends to stop falling and bounce upwards. Institutional buy orders cluster here, absorbing sell volume and reversing downtrends.
- Acts as a barrier/floor preventing lower tick prices
- Formed at historical swing lows and major round numbers (e.g. $60k BTC)
- Traders use support tests to enter long trades with tight stops beneath the floor
Resistance Zone
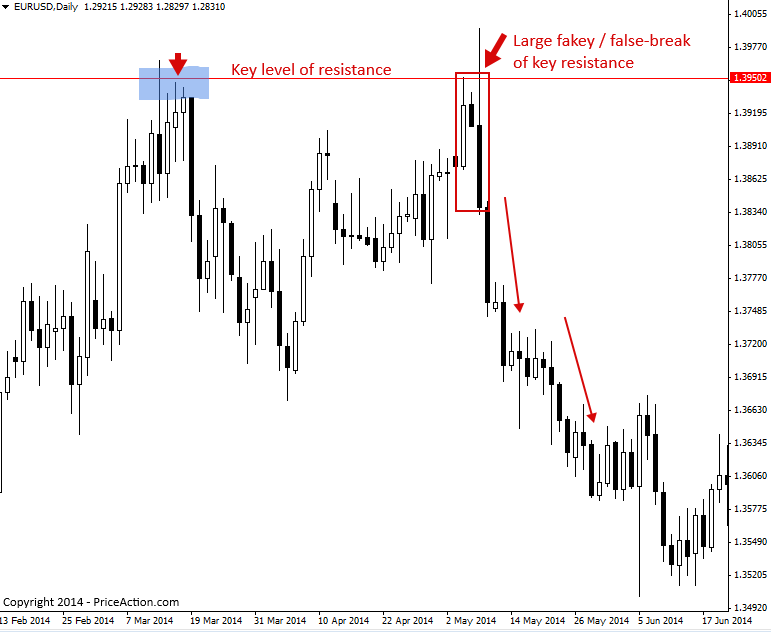
A price level where a crypto asset tends to halt rising and reverse downwards. Institutional selling orders overwhelm demand, capping upward price progress.
- Acts as an overhead ceiling preventing higher prices
- Formed at previous swing highs and distribution supply pools
- Traders utilize resistance tests to take profits or initiate short trades
Trend Reversal
Price hits an established support or resistance boundary and turns in the opposite direction due to limit order absorption.
Breakout / Breakdown
Price breaches support or resistance with volume momentum, signaling the start of a strong trend continuation impulse.
Role Reversal (Flip)
Once an old resistance ceiling is broken, it flips into new support floor on the retest (and broken support becomes resistance).
How to Draw Error-less 100% Accurate Support and Resistance
Precise rules for plotting valid institutional zones in crypto trending vs range-bound markets
Define Time Frame
For general trading, use the 15-minute or 1-hour interval for intraday, and 4H/Daily for swing setups.
Pre-Built Indicator
Select indicator: 'Swing High Low' to automatically mark undisputed market turning pivots.
Wick vs Body Rule
You are allowed to cut through candle wicks, but never slice through candle bodies.
Join Maximum Points
Adjust zones slightly to intersect the highest frequency of candle touches and rejections.
Zoom Out 300+ Bars
Always zoom out at least 300 candles to reveal historical institutional liquidity pools.
Connect Major Swings
Draw horizontal zones connecting at least 2 distinct swing highs or swing lows.
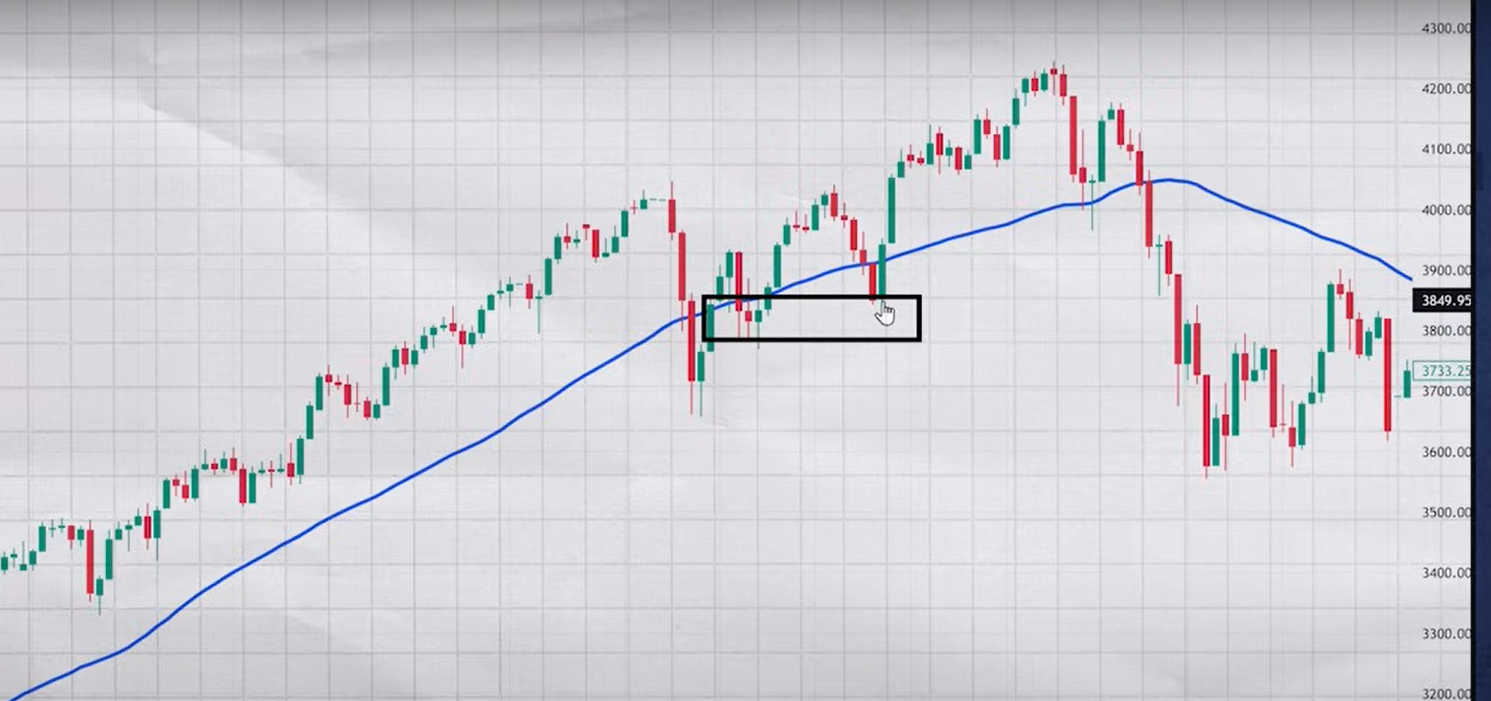
1. In Trending Market
2 Swing PointsConnect the 2 most recent swing points (higher lows in uptrend, lower highs in downtrend) to project the dynamic trendline channel.
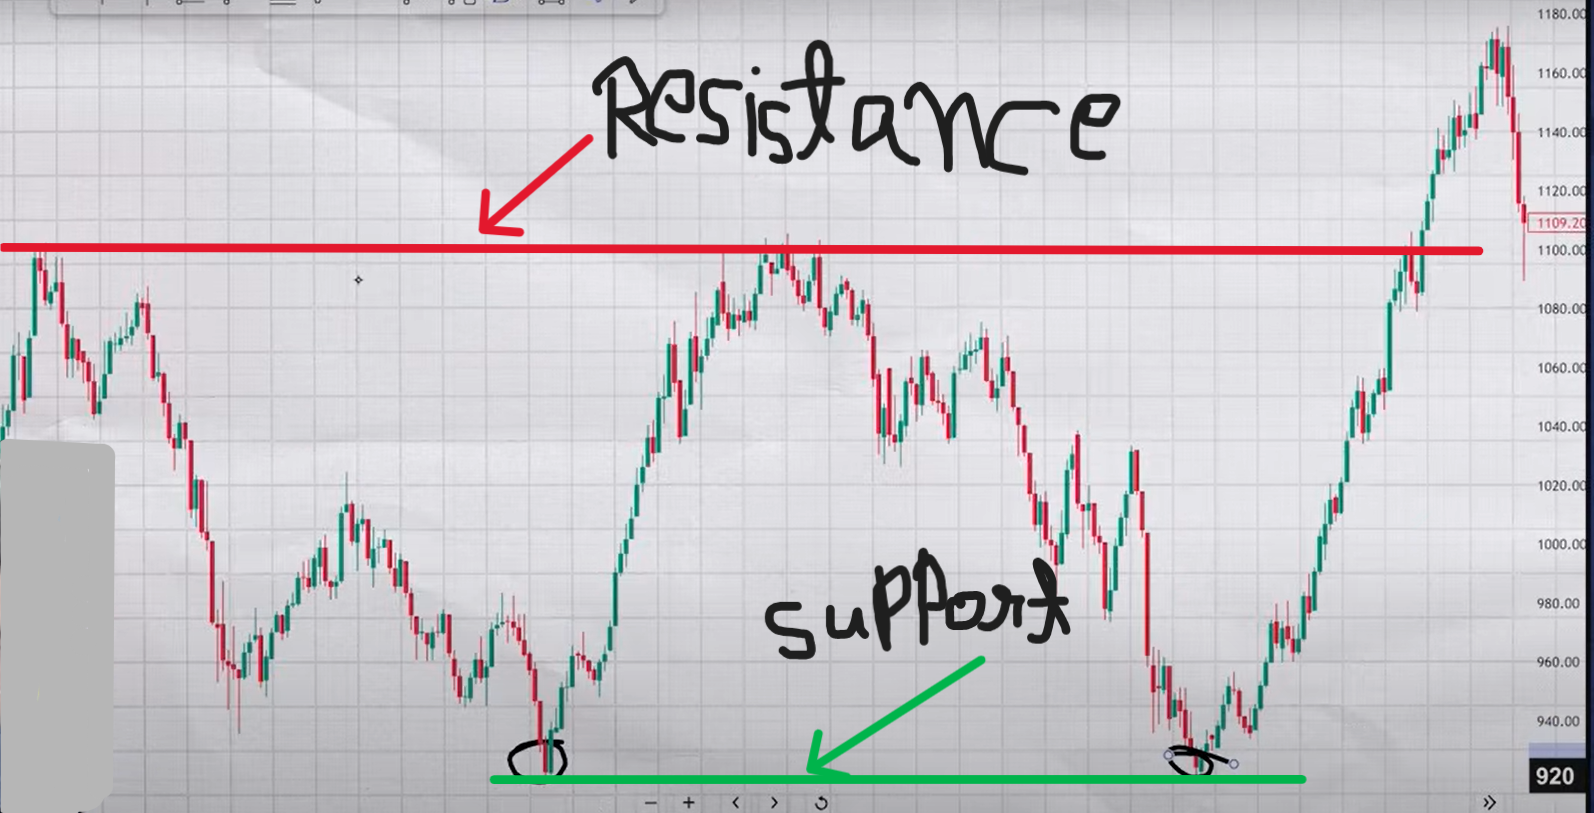
2. In Range Market
Highs & Lows BoundaryDraw the horizontal high and low boundary boxes of the consolidation range. Adjust the rectangle to capture the maximum number of touch points.
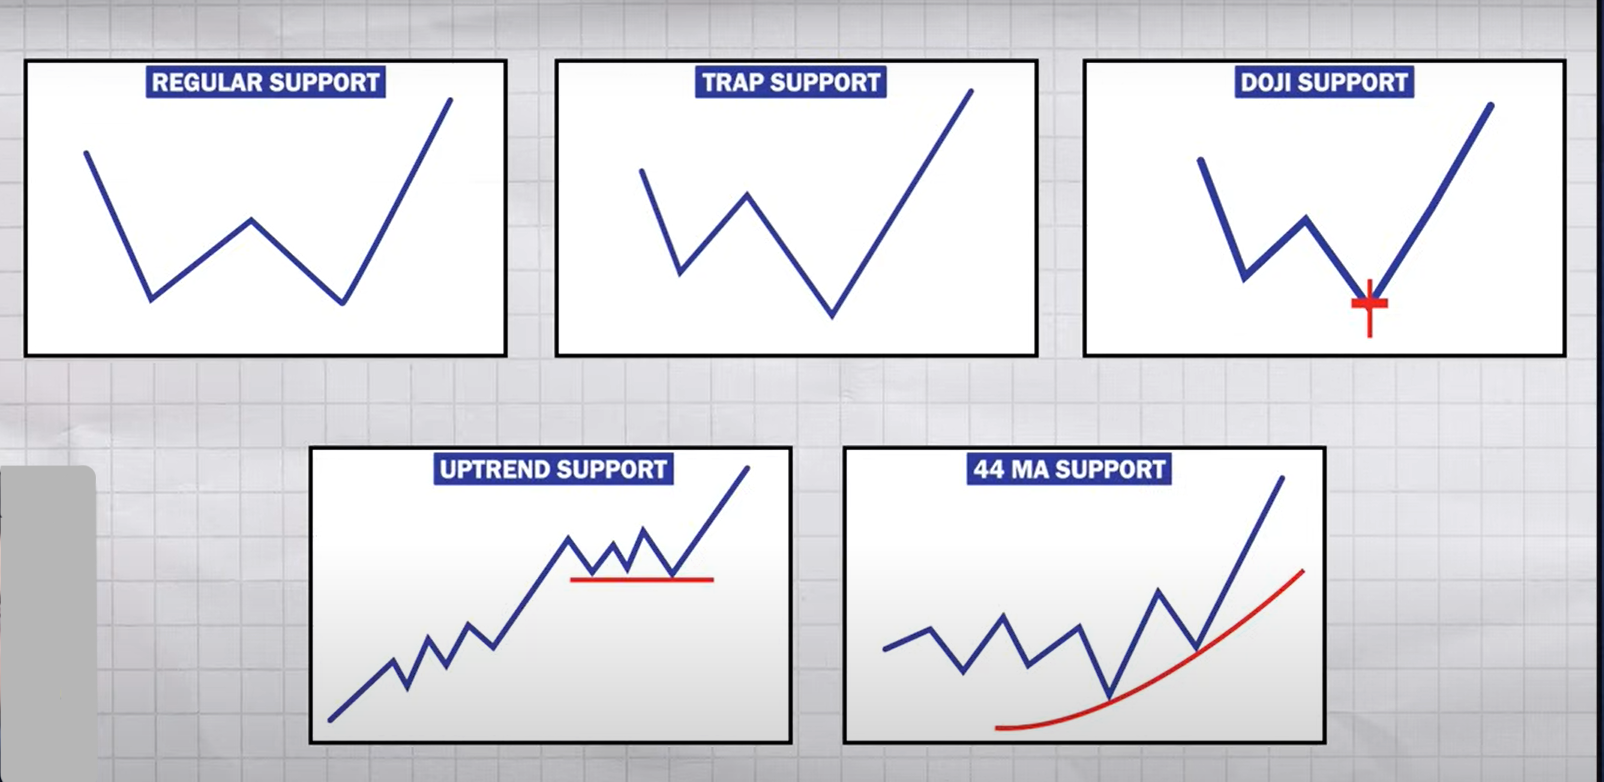
Top 5 Support and Resistance Structural Models
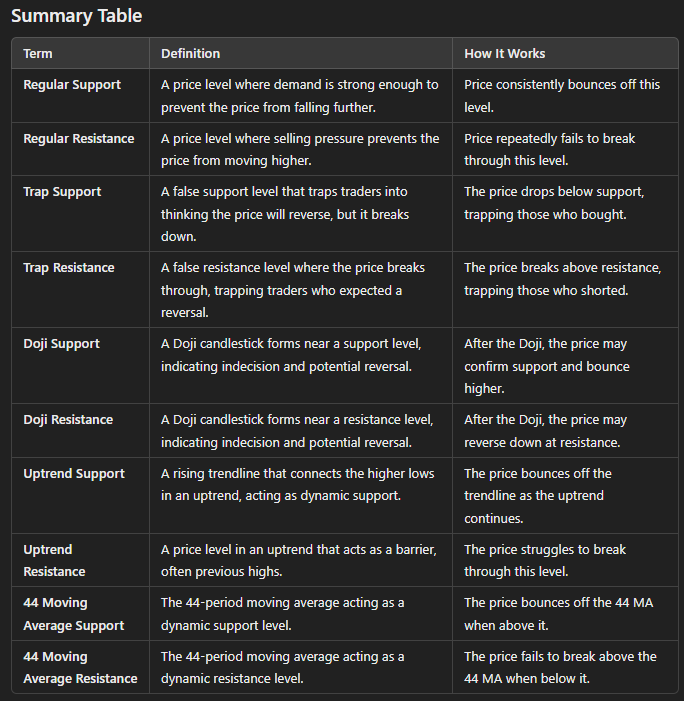
Visual Summary- Regular Support & Resistance: Horizontal swing levels holding steady volume.
- Trap Support & Resistance: Liquidity wicks designed to stop out retail orders.
- Doji Support & Resistance: Equilibrium candles signaling impending reversal.
- Uptrend Support & Resistance: Diagonal dynamic trendlines guiding market trends.
- 44 Moving Average Support & Resistance: Dynamic institutional moving average buffer.
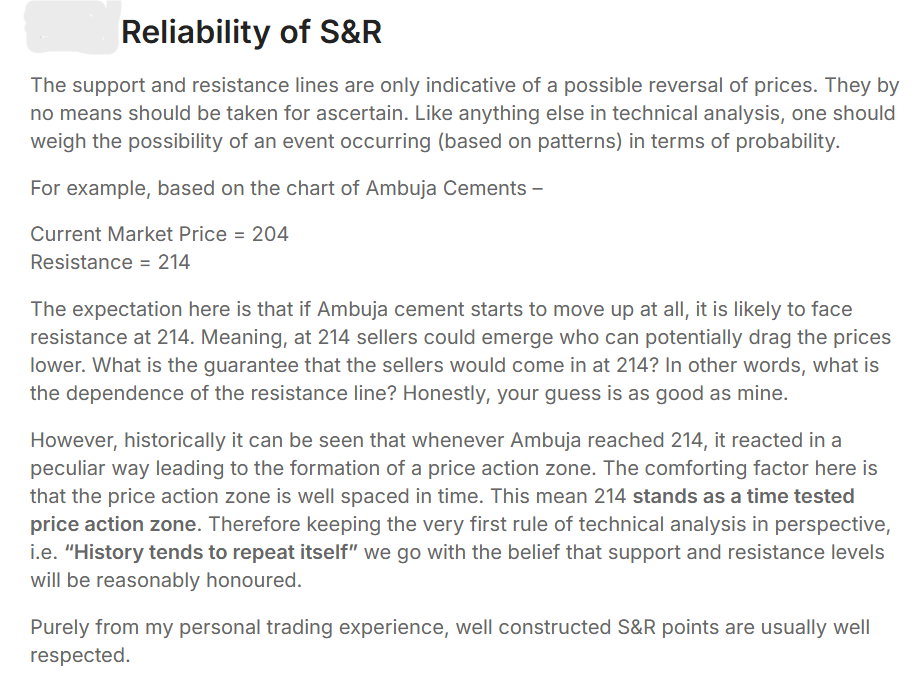
S&R Reliability Factors
- • Number of Touches: More touches = stronger, more validated zone
- • Timeframe: Higher timeframes (Daily/4H) carry vastly more significance than 1m/5m
- • Volume: High volume at the level = heavy institutional commitment
- • Recent Activity: Recently formed levels are more relevant than multi-year old levels
Key Trading Execution Points
- • Entry: Buy near support zones, sell or short near resistance ceilings
- • Stop Loss: Place stops beneath support for longs, and above resistance for shorts
- • Breakouts: High-volume expansion through S&R signals trend acceleration
- • Confirmation: Always wait for candle close confirmation before executing
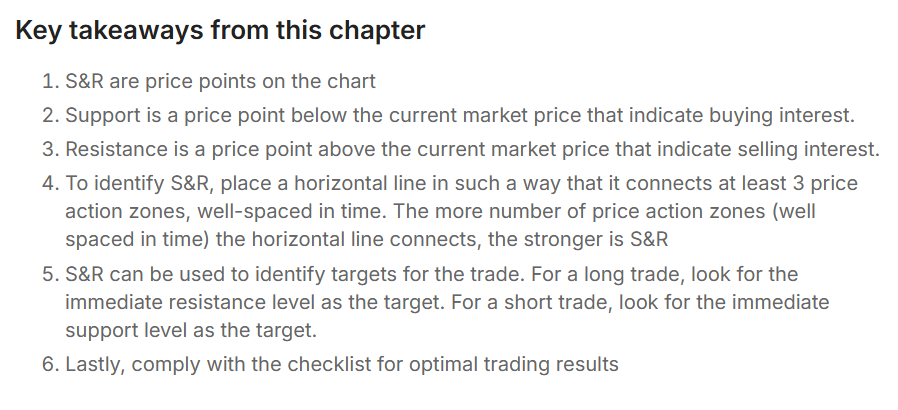
Comprehensive Support & Resistance Taxonomy
Regular Support
Support is a price level at which a crypto asset tends to find buying interest and where price typically reverses upward after falling. It acts as a 'floor' preventing further decline.
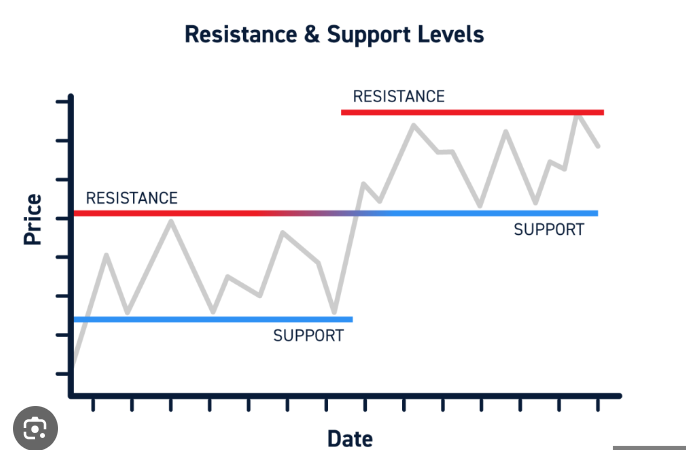
Regular Resistance
Resistance is a price level where selling pressure exceeds buying interest, causing price to reverse downwards. It acts as a 'ceiling' preventing higher prices.
Trap Support (Bear Trap)
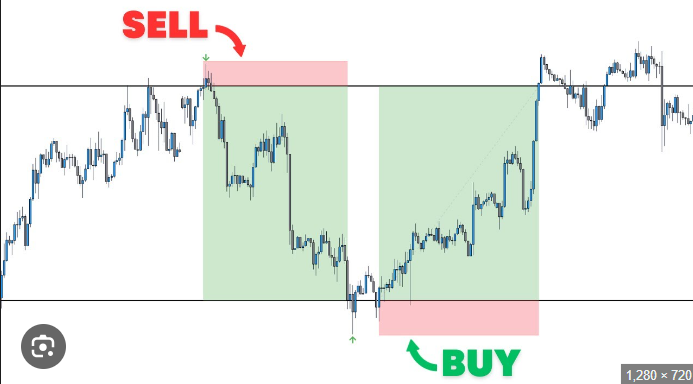
Trap support occurs when price briefly pierces below support, triggering retail stop-loss orders before aggressively reversing back upwards.
Trap Resistance (Bull Trap)
Trap resistance occurs when price temporarily breaks above resistance, enticing breakout buyers before plunging downwards.
Doji Support
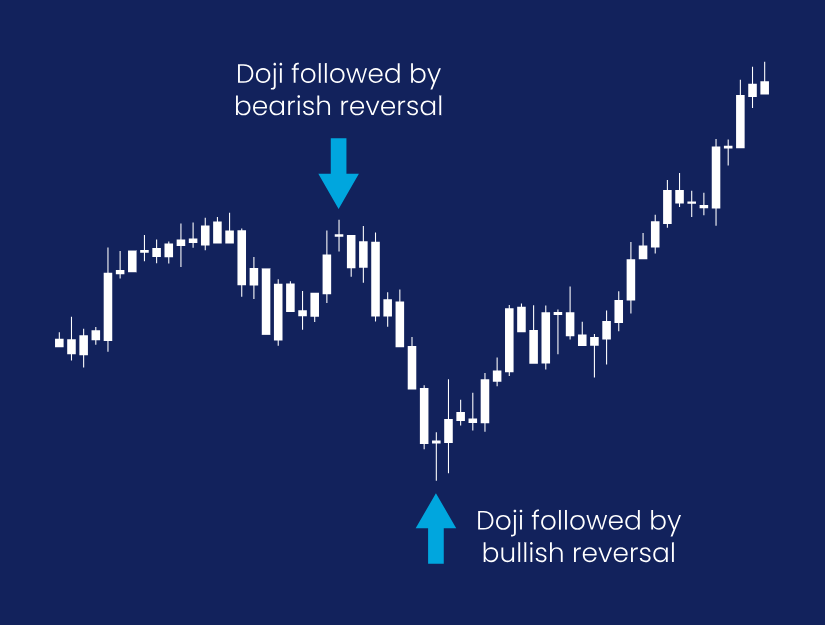
A Doji candlestick forming at or near a key support floor indicates indecision and exhaustion of sellers, signaling a potential bullish reversal.
Doji Resistance
A Doji candlestick forming at overhead resistance highlights buyer exhaustion at the top of an impulse, foreshadowing a downward correction.
Uptrend Support
In an uptrend, support is a rising dynamic trendline connecting swing higher lows. It acts as a dynamic floor where buyers re-enter.
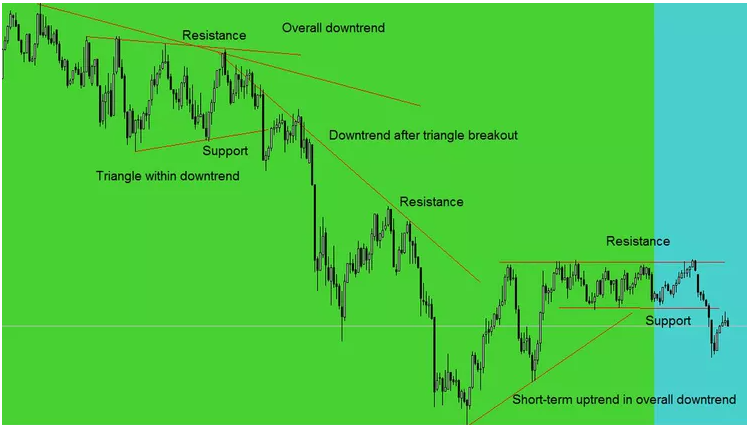
Uptrend Resistance
Overhead trendline or horizontal zone capping the peaks of an uptrend, where traders take partial profits.
Downtrend Support
Lower boundary of a descending channel where short sellers cover profits and brief relief bounces occur.
Downtrend Resistance
Falling dynamic trendline connecting lower highs. Institutional sellers use tests of this falling ceiling to initiate short trades.
Moving Average Support
Key institutional moving averages (50 EMA, 200 EMA) acting as dynamic price floors during strong macro bull trends.
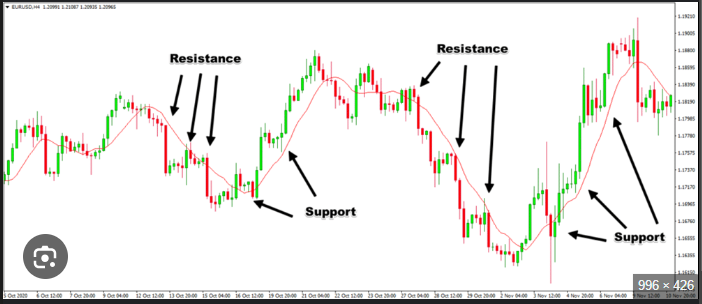
Moving Average Resistance
Major moving averages acting as overhead resistance during bear markets, repelling relief rallies.
Psychological Round Number Support
Major round figures where retail and algorithmic orders concentrate (e.g. $60,000, $50,000 BTC).
Master Blueprint: Top Support & Resistance Comprehensive Summary
13 Visual S&R Case Studies & Real Charts
Click to Inspect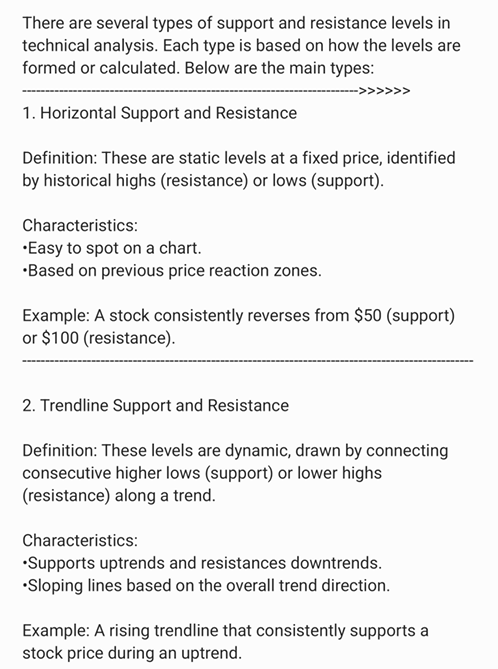
Case Study 01: Key Floor Bounce
Multi-touch demand rejection with strong bullish continuation candle
Case Study 02: Ceiling Rejection
Overhead supply absorption followed by bearish rejection pin-bar
Case Study 03: Support Breakout Breakdown
High-volume structural candle close below horizontal base
Case Study 04: Role Reversal Retest
Former ceiling flips into new rock-solid demand cushion upon pullback
Case Study 05: Liquidity Trap Sweep
Wick hunt below support level trapping early short sellers before reversal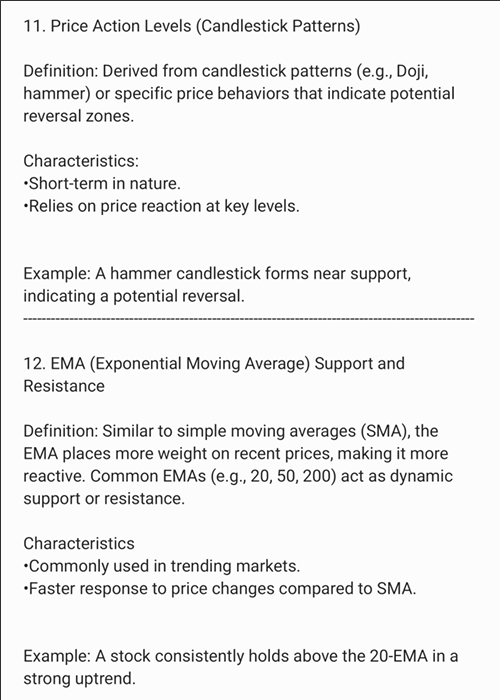
Case Study 06: Ascending Channel Support
Diagonal higher-low trendline bounce in alignment with bull trend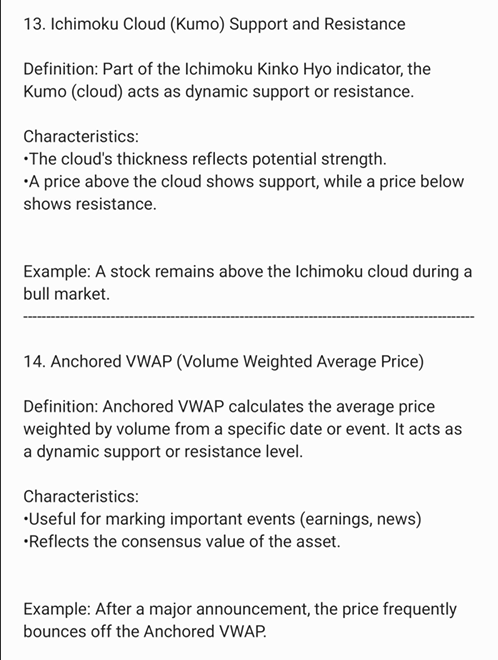
Case Study 07: Range Bound Oscillation
Equilibrium trading between well-defined upper and lower horizontal boundaries
Case Study 08: Moving Average Dynamic S&R
Institutional moving average serving as sloping dynamic support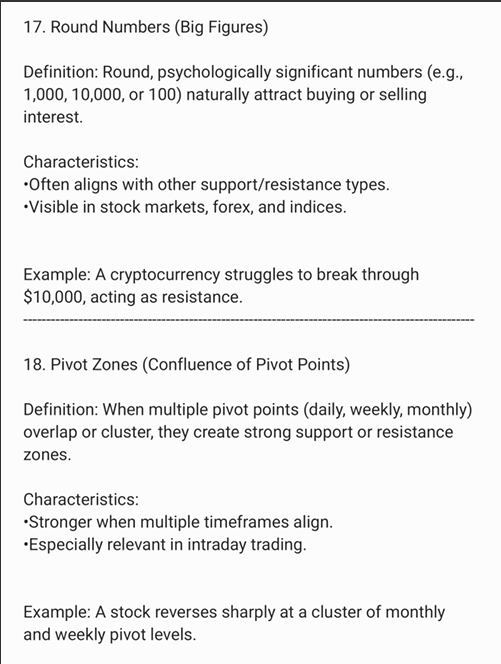
Case Study 09: Double Top at Resistance
Two successive failed attempts to breach resistance sparking downtrend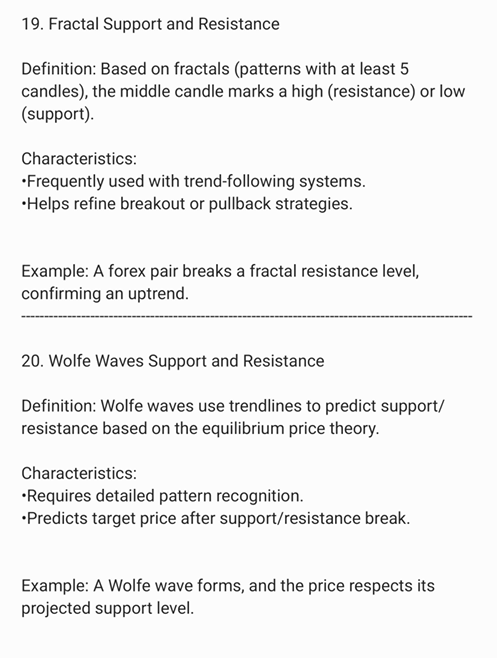
Case Study 10: Double Bottom at Support
Bullish W-formation reversal with high-volume breakout confirmation
Case Study 11: Trendline Fakeout Trap
False breakout beyond diagonal boundary resulting in rapid snap-back
Case Study 12: Price Gap Retest Zone
Unfilled CME gap acting as strong institutional liquidity magnet and support